Setup an airgapped smartcard wallet
Prerequistes
This guide explains how to setup an airgapped smartcard wallet with Sparrow to create a secure Bitcoin storage solution. A smartcard wallet is a hardware wallet in a credit card format - your keys are held on a secure element chip in the card, and data is exchanged through a card reader. Sparrow supports the Tapsigner, Satschip, Satochip and Keycard.
You will need a card reader that the card can be inserted into or placed on top of. If you don’t have one, the this NFC card reader is a good choice.
We will be using a Keycard in this guide, but the process is very similar for all smartcard wallets. If you would rather use a hardware wallet with a screen, see the Setup a connected hardware wallet, Setup an airgapped hardware wallet with QR codes or Setup an airgapped hardware wallet with SD cards guides. If you haven’t read the Quick Start guide yet, that’s a good place to learn how to install and get introduced to Sparrow.
Why use a hardware wallet?
If you’ve followed the Quick Start guide, you will already have Sparrow running with a software wallet. This is a good place to start getting familiar with sending and receiving Bitcoin transactions, and is a reasonable option to store small amounts. If your balance starts to grow however (to the point where you would care about losing it), then it’s time to consider purchasing a hardware wallet.
Hardware wallets offer something that software wallets cannot - they are simple devices that store your private keys and sign transactions, but otherwise have very limited connectivity and functionality. This is a good thing, because it means they are very difficult to hack! In a connected world of viruses and other malware, hardware wallets represent a major improvement in securing your Bitcoin.
Why smartcards?
Smartcard wallets are the simplest hardware wallets of all - there is no battery, screen, buttons or cable, just a secure element chip embedded in a credit card sized package. This makes them inexpensive, durable and highly portable - a card can be stored discreetly in a wallet or safe. The card itself is never plugged into your computer - it communicates through the card reader using the same protocol as bank cards. Like other hardware wallets, the card only receives transactions to sign and only returns signatures - your private keys never leave the secure element.
The trade-off is that a card has no screen, so you cannot independently verify addresses and transactions on the device as you can with other hardware wallets. This means you place more trust in the computer running Sparrow. Cards are well suited to storing small to medium amounts - for larger amounts, consider a hardware wallet with a screen using one of the other guides.
Why Keycard?
There are many smartcard wallets available to purchase. The Keycard is a good choice because it:
- Runs fully open source software that anyone can inspect
- Is inexpensive compared to most hardware wallets
- Uses a certified secure element chip to protect your keys
It is worth noting however that other choices are also reasonable, and in fact it is preferable when setting up a multisig wallet to use multiple vendors. As mentioned above, this guide applies generally to all smartcard wallets.
Ordering and receiving
The Keycard should be ordered from the Keycard store only, and not third party resellers. The same advice applies to any hardware wallet vendor - buying direct removes the chance of receiving a device that has been tampered with along the way. Ideally, have it shipped to an address that is not your home - but don’t let this be a reason for not buying one! This is also a good time to order a card reader if you don’t have one - the this NFC card reader works well with all the supported cards. For the Keycard specifically, you can also order the Keycard Shell which gives you QR code capable hardware wallet with the Keycard at its core.
Once you have received your Keycard, examine the packaging for tampering before opening it. Your vendor’s site will describe what to look for on your particular card. If you’re confident the package has not been tampered with, you can open it and proceed to setting up the card.
Setting up your Keycard
Before Sparrow can use your Keycard, the card needs to be initialized - that is, create a new wallet seed and set a PIN. Unlike other hardware wallets, cards have no screen or buttons, so initialization is done through Sparrow itself. Connect your card reader to your computer, and insert the Keycard into it (or place the card on top, depending on your reader).
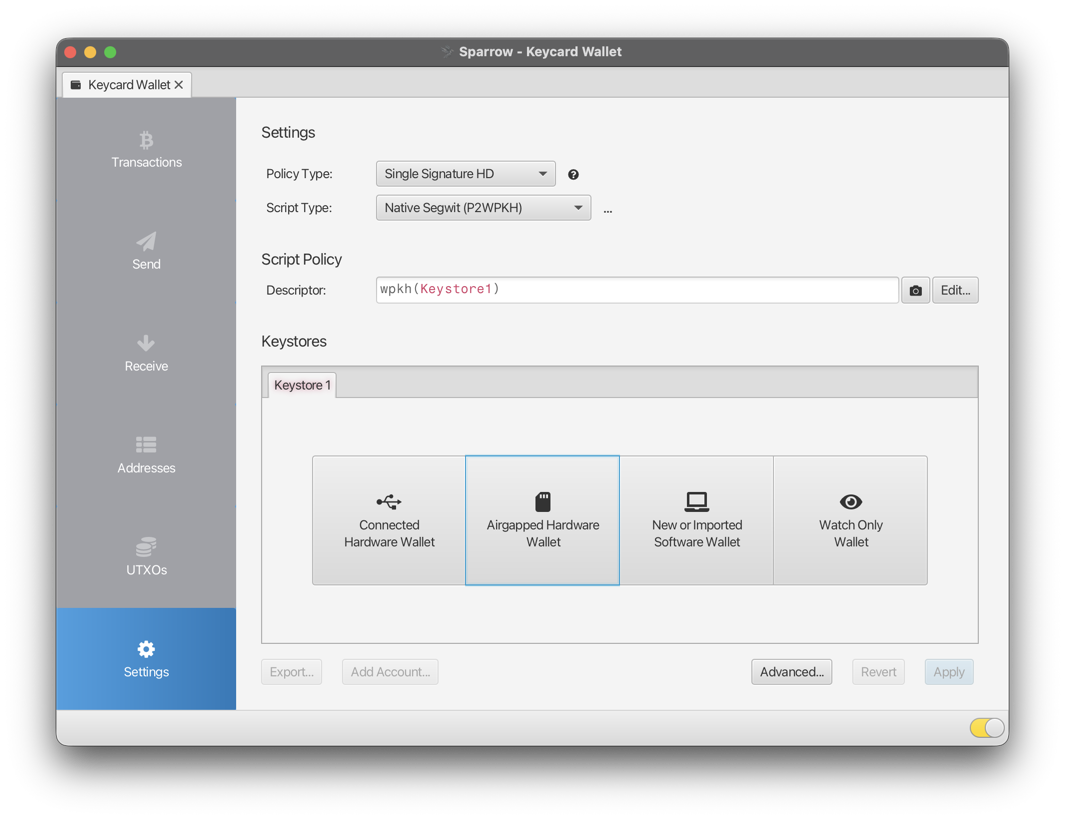
In Sparrow, from the menu select File > New Wallet and choose a name for your wallet. You will now see the Sparrow wallet Settings screen. You can leave all of the fields on the defaults and select ‘Airgapped Hardware Wallet’ from the four buttons below. (Although the card communicates through the connected card reader, it remains an airgapped device - the card itself is never plugged into your computer.)
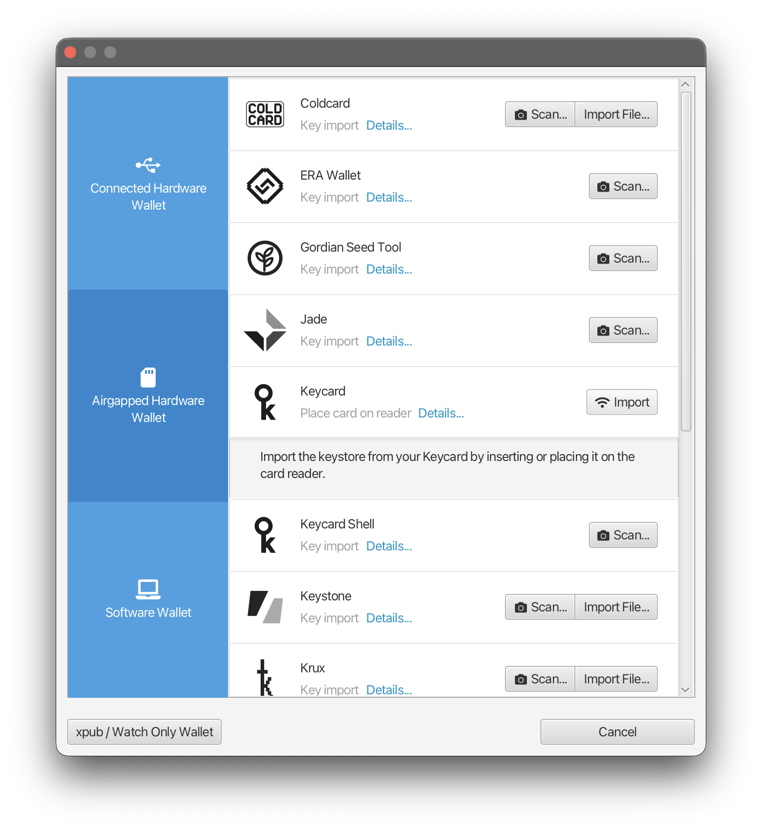
You will see a list of different import options for various hardware wallets. Look for the Keycard option and click the button to read the card. (Note clicking on the ‘Details’ link will display the instructions for your particular card.) If the card is not found, check it is correctly positioned on the reader and try again.
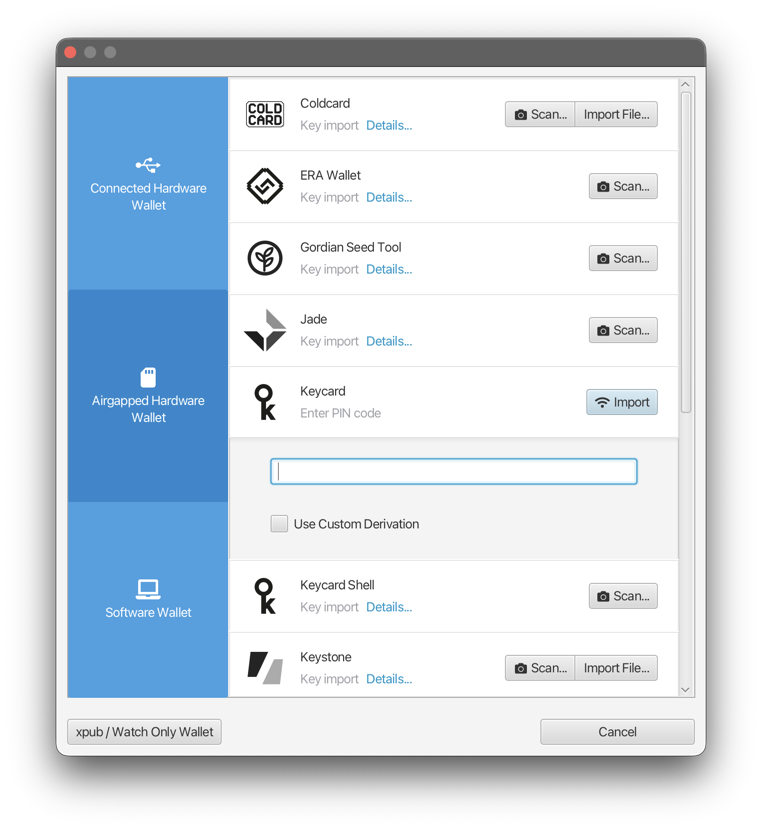
Since your card has not yet been initialized, Sparrow will offer to initialize it. You will be asked to choose a PIN. Similar to a phone passcode, this PIN is an important defense against others using the card to sign transactions and steal your Bitcoin. Choose a PIN that others cannot easily guess, and that you can remember. (Note that this varies between vendors - on the Tapsigner for example, the initial PIN is printed on the back of the card.)
During initialization, a unique, long random number is generated, which is the seed for your wallet. You may then be asked to backup the seed. Every vendor has a slightly different process - some cards provide a set of seed words to write down, while others (like the Tapsigner) create an encrypted backup file which is decrypted using a key printed on the card. If you are asked to write down seed words, do so carefully on paper only (or even better, on a metal plate).
These words (or the backup you have created) are the key to your wallet - anyone who has them can steal your Bitcoin! Store them in the most secure place you can think of, and consider making another copy for a second location in case of fire etc.
Congratulations! Your Keycard is now ready.
Importing your Keycard into Sparrow
Although your Keycard is great at keeping your seed secure, it can’t create a transaction or display your balance. For that, you need Sparrow. Importing your Keycard into Sparrow means importing the public key details into Sparrow so it can display your balance and addresses, and send and receive transactions to your wallet.
The difference between public and private keys is beyond the scope of this guide, but know that someone who has your public key can see your wallet transactions, but can’t steal your funds. The Keycard will never export your private key.
Once the card is initialized, Sparrow will read the public key details from the card - you may be asked to enter your PIN. Sparrow will import the details for the default derivation path and display them on the Settings screen:
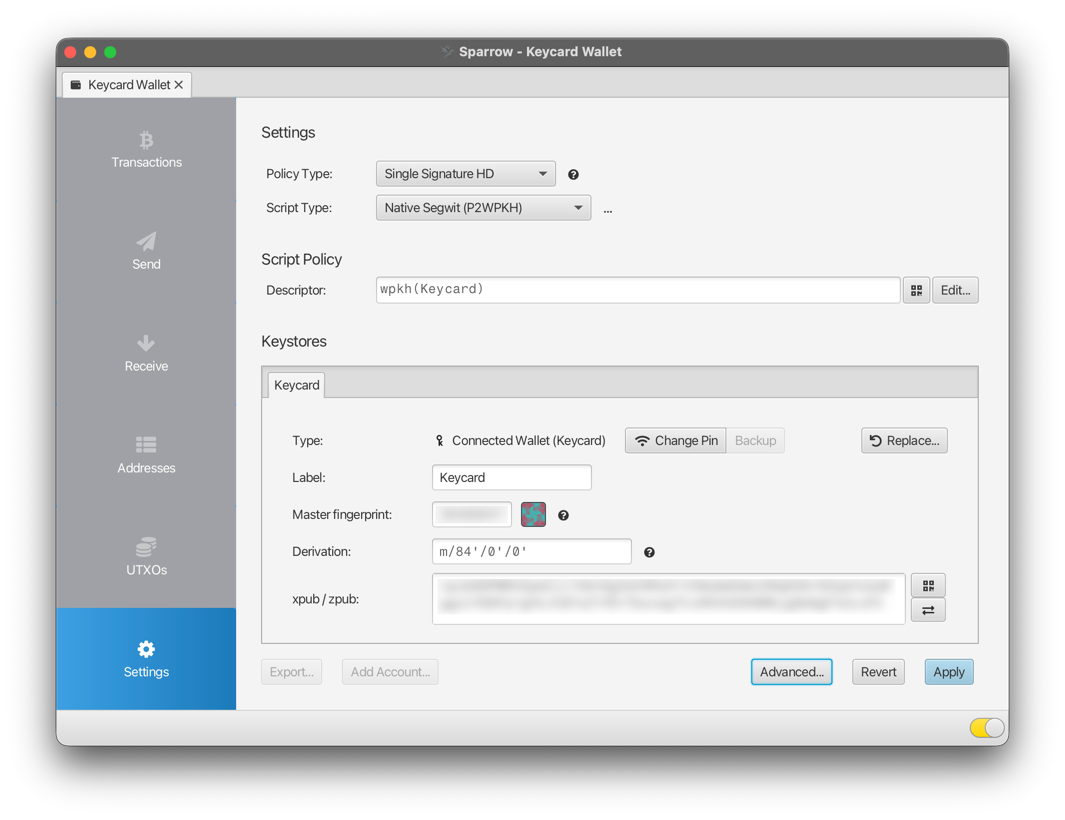
You can now click ‘Apply’ at the bottom. You should choose a good password to protect the wallet file - even though the Keycard is protecting your funds from being stolen, a password on the Sparrow wallet protects your privacy. If Sparrow is connected it will look for any transactions, but since this is a new wallet there won’t be any.
Congratulations! Setup is complete and your wallet is ready to receive bitcoin.
Receiving Bitcoin
In Sparrow, using the blue menu on the left select ‘Receive’. The address field will display the first receive address in your wallet:
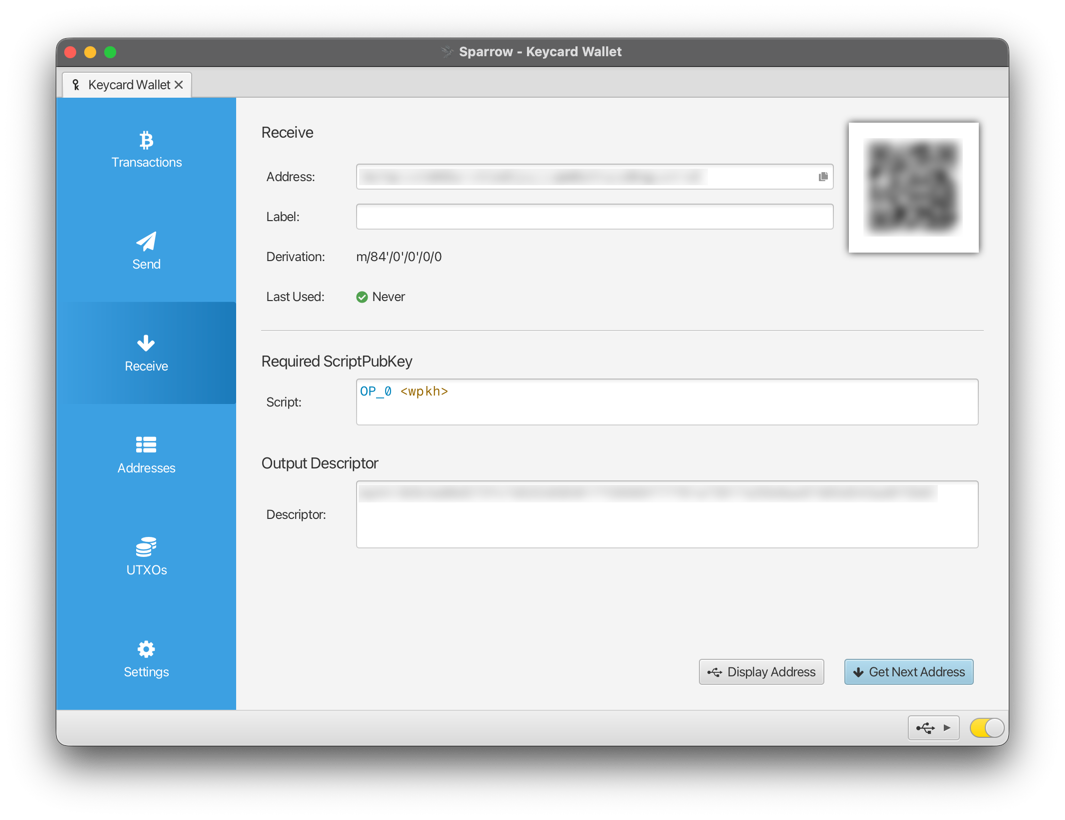
Note that because the card has no screen, you cannot verify the address on the device as you can with other hardware wallets. Keeping your computer secure and up to date is therefore particularly important when using a smartcard wallet.
You can now receive to this address, for example from an exchange. Once the exchange has sent the funds, you will see a new transaction in the Transactions screen (top button on blue menu) in Sparrow. Generally you should wait for at least one confirmation of this transaction (about 10-30 minutes) before you can send bitcoin from this wallet. However, if you are sending to yourself, you can send a transaction immediately.
Sending Bitcoin
Once your wallet has funds, you can send from it. To do this, go to the Send screen and enter the destination address, the label and the amount. Note that you can use an address from this wallet (send to yourself) using the drop-down arrow on the right in the address field. You can then click ‘Create Transaction’. This will open up the transaction editor with your new transaction, where you can inspect the inputs and outputs. For now though, we are going to practice signing with the Keycard.
Click the large blue ‘Finalize Transaction for Signing’ button. You will now see the Signatures area, which shows the progress of signing the transaction. Because the card communicates through the connected card reader, simply click the ‘Sign’ button with the NFC icon. Make sure the card is on the reader - Sparrow will open a dialog and ask for your PIN before sending the transaction to the card:
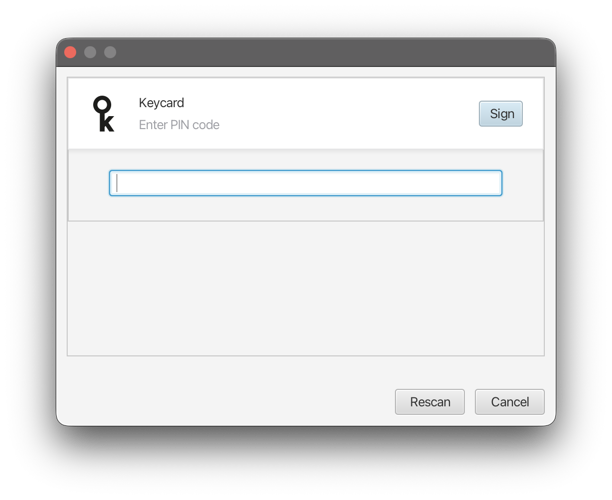
Since the card cannot display the transaction, it’s important to verify the details carefully in Sparrow before signing. Check that the address and amount matches. You can select from the Outputs tree on the left in the Sparrow transaction editor to view these details.
Once you’re satisfied, enter your PIN. The Keycard will sign the transaction and return the signature to Sparrow. The signatures progress bar will fill to indicate the transaction is now signed! To send the transaction, click ‘Broadcast Transaction’. Your transaction will be broadcast to the Bitcoin network, and hopefully be confirmed into the blockchain shortly.
Congratulations! You now have a secure Bitcoin storage solution, and can send and receive from it. Keep your card and your seed backup in a safe place - they will make sure you don’t need to worry about loss of funds!
Bonus: Adding an account
You can now add an account to your wallet, which is in effect creating a second Bitcoin wallet based on the same seed but a different derivation path. A second account allows you to segregate funds (for example KYC and non-KYC funds) which ensures that differently sourced UTXOs are not linked when spending. You can also use accounts to segregate funds intended for different purposes.
To add an Account, go to the Settings tab in Sparrow and click Add Account… at the bottom. You will be able to select from multiple different accounts - for now, select Account #1.
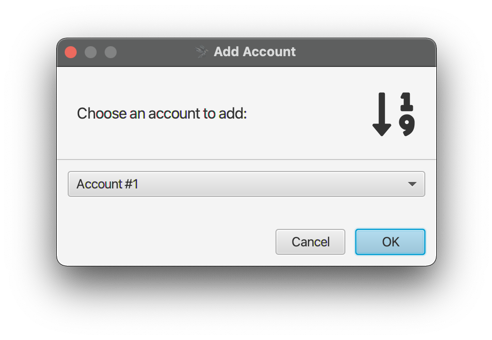
Sparrow will then add a row of tabs on the left. The wallet account you have recently configured will be labelled Deposit, and the new wallet account is Account #1.
With a smartcard wallet there are no files to export - make sure the card is on the reader, then click ‘Airgapped Hardware Wallet’ from the four buttons in Sparrow and read the card again. Sparrow will retrieve the public key details for the new account directly from the card. You can then click Apply, and your second account is ready for use!