Quick Start Guide
Installation
Sparrow can be downloaded from the Download page. Be sure to follow the instructions on the page to verify your download before proceeding. Once verified, install and run Sparrow as normal for your operating system.
Welcome to Sparrow
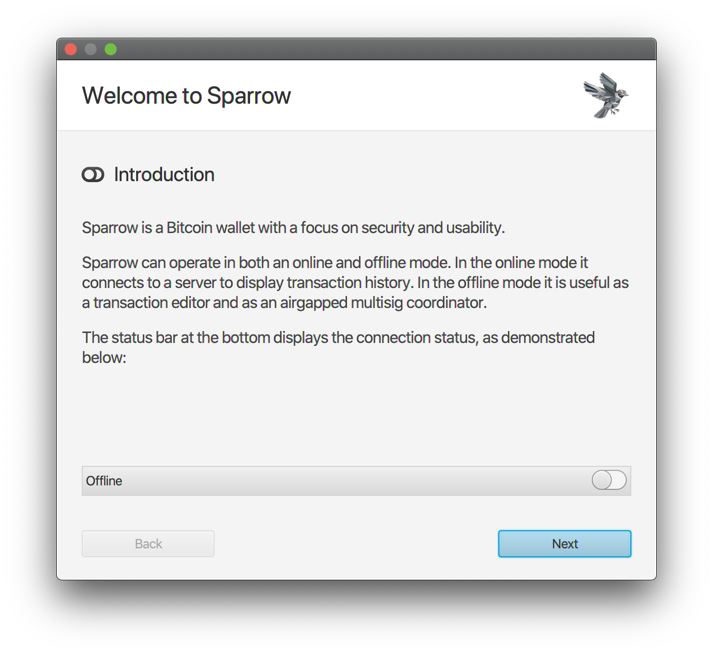
Every new Sparrow installation starts with a Welcome wizard to explain the different ways of connecting Sparrow to the Bitcoin blockchain. You can also use Sparrow offline to verify wallet addresses, and analyse and sign transactions and messages.
There are 3 ways to connect Sparrow to a server to view your balance, and send and receive transactions:
 Public server
 Bitcoin Core node
 Private Electrum server
In this guide, we’ll be connecting to a public server. This means sharing your public key information (and thus your privacy) with whoever is running the server. It is not recommended to do this for any significant funds, but it’s a simple way to start using Sparrow.
The Welcome screen also explains how you can switch between online and offline mode at any time when using Sparrow with the toggle button  that appears in the status bar.
The toggle will change color depending on which one of the 3 types of connections you are using.
that appears in the status bar.
The toggle will change color depending on which one of the 3 types of connections you are using.
Sparrow Server Setup
After you have completed the Welcome wizard, click Configure Server and you will see the following dialog:
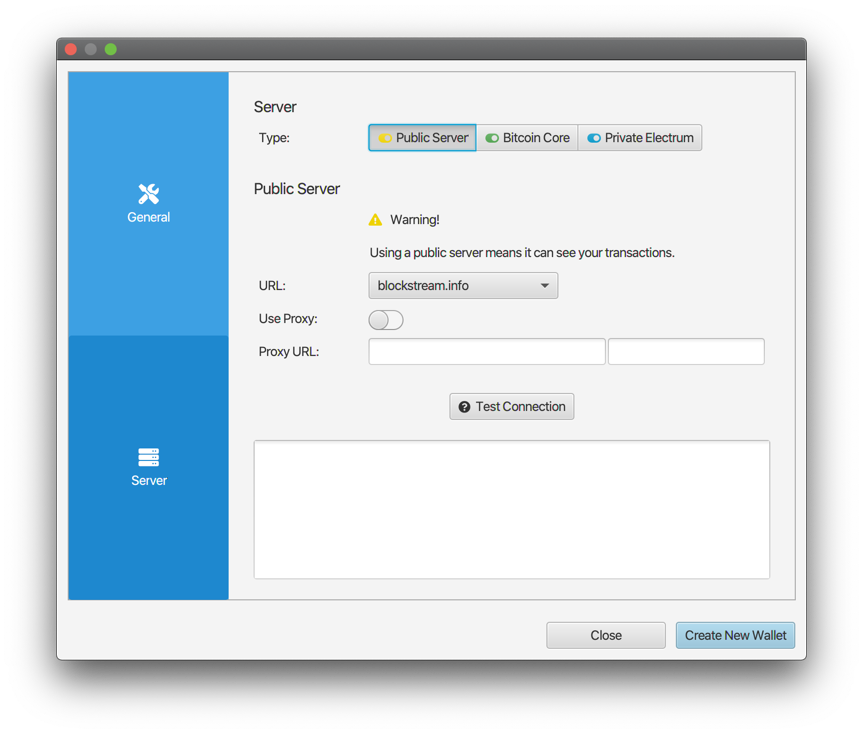
Warning: It is not advisable to use Sparrow with a public server if you plan to store any significant funds. In that case, you should only connect to a server you trust. Your funds are never at risk, but your privacy is shared. Read the best practices guide for further information in considering which approach is right for you.
Note that the URL in the dialog might be different for you, since Sparrow selects a server randomly if one is not configured. There is no additional configuration necessary.
From here, you can proceed to click Create New Wallet.
Creating Your First Wallet
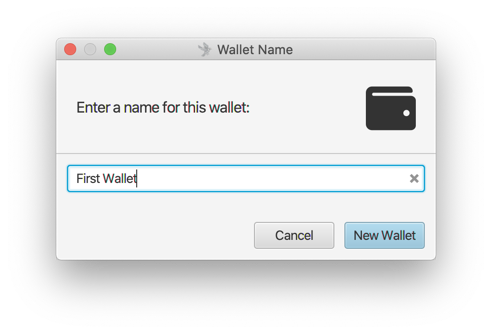
Enter a name for your first wallet and click New Wallet:
You are now shown the Settings screen for your new wallet. Every Sparrow wallet has the following details:
| Field | Available Values |
|---|---|
| Policy Type | Single Signature or Multi Signature |
| Script Type | What type of Bitcoin script will be used (Native Segwit, Nested Segwit etc) |
| Keystores | Details of the public and private keys your wallet is aware of |
For this guide, we are going to create a single signature wallet using a Native Segwit (P2WPKH) script type. This is the default, so we can leave the settings as they appear:
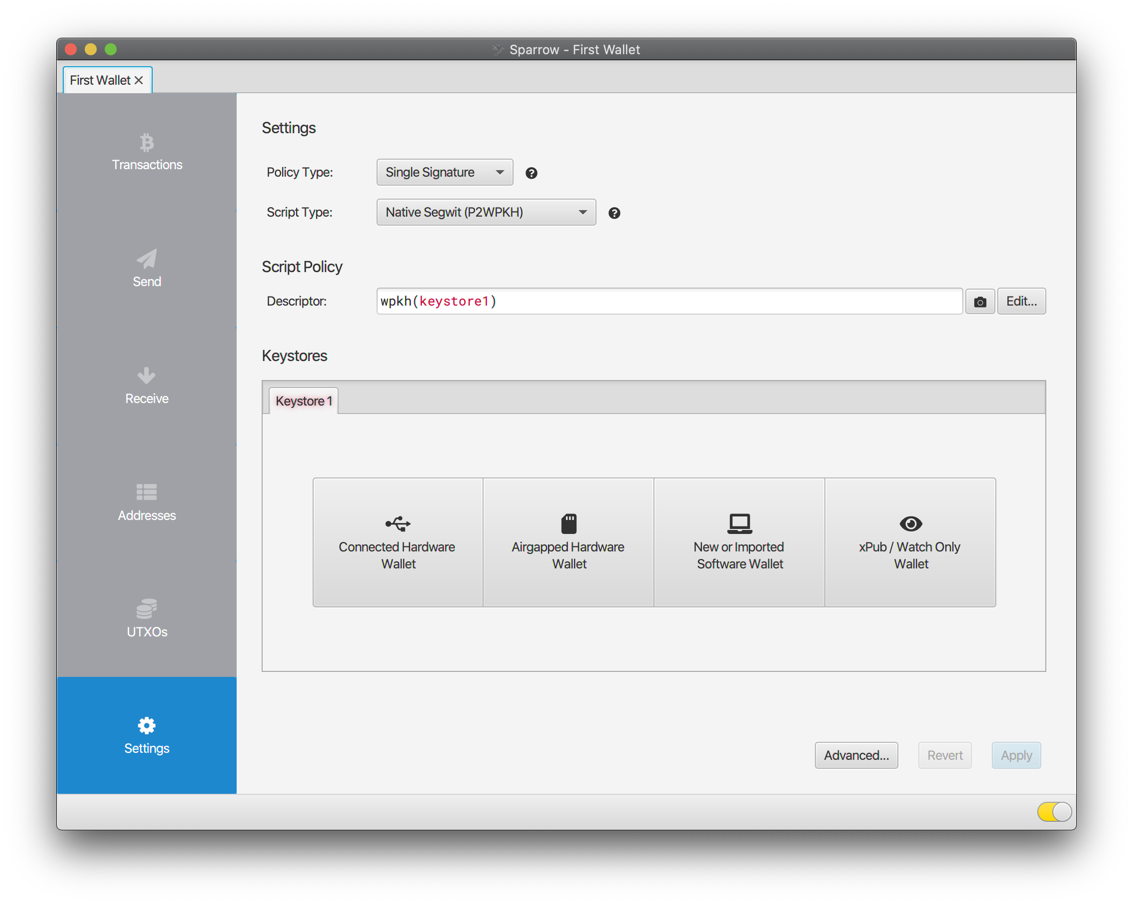
Now we need to choose which kind of keystore we want for this wallet. You can choose between four different kinds:
| Type | Description |
|---|---|
| Connected Hardware Wallet | For connecting your Coldcard, Trezor etc with USB to your computer |
| Airgapped Hardware Wallet | For adding your Coldcard or Cobo Vault hardware wallet without connecting it |
| New or Imported Software Wallet | To create a wallet with the private keys in Sparrow, or to import a wallet (like Electrum) |
| xPub / Watch Only Wallet | To create a wallet with an xpub that can see your transactions but not spend them directly |
For this guide we are going to create a Software Wallet. Select the 3rd button, New or Imported Software Wallet.
This opens the Keystore screen. Here you can see on the left the first 3 types of keystores from the table above. For Software Wallets, you can choose Mnemonic Words (BIP39) or Electrum import. This guide will create a keystore using BIP39, a common standard which uses a set of words to create a private key or seed. We are going to choose the minimum number of words (12) by clicking on the arrow next to Enter 24 Words to open the dropdown:
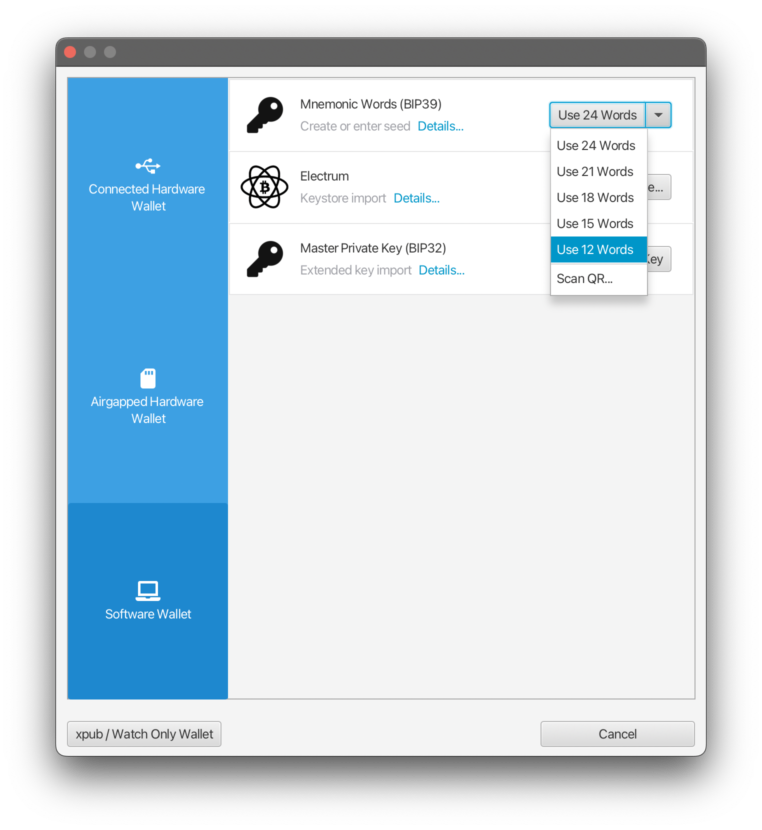
Click Enter 12 Words. You will now see 12 text fields which will contain the secret words for our seed. Click the Generate New Button to get Sparrow to randomly choose 12 words (note your words must be different!):
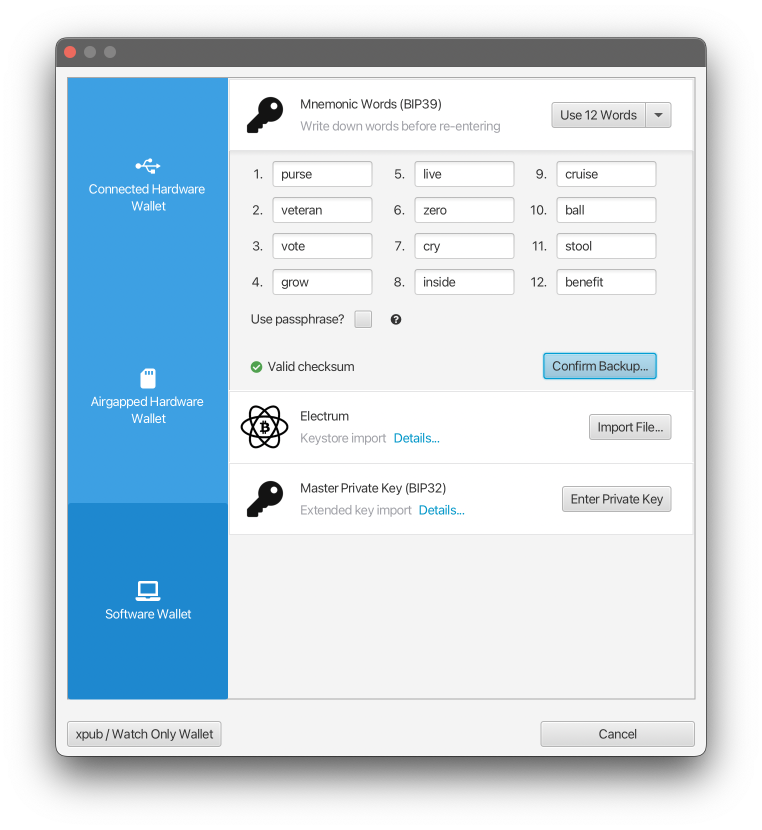
You will now need to write these words down for safekeeping. Sparrow checks that you have done this process correctly by asking you to re-enter the words. Click Confirm Backup…, then Re-enter Words… and re-enter the 12 words in order. If your words are correct, Sparrow will indicate this by displaying message with ‘Valid checksum’. Now click Create Keystore to create your seed.
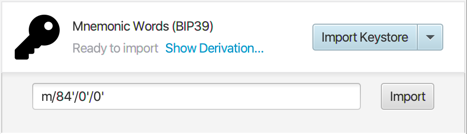
Sparrow will then give you the opportunity to check your derivation path. We don’t need to make a change here, so click Import Keystore:
Sparrow will use your seed to calculate the xpub for the derivation path specified, and display it on the Settings screen:
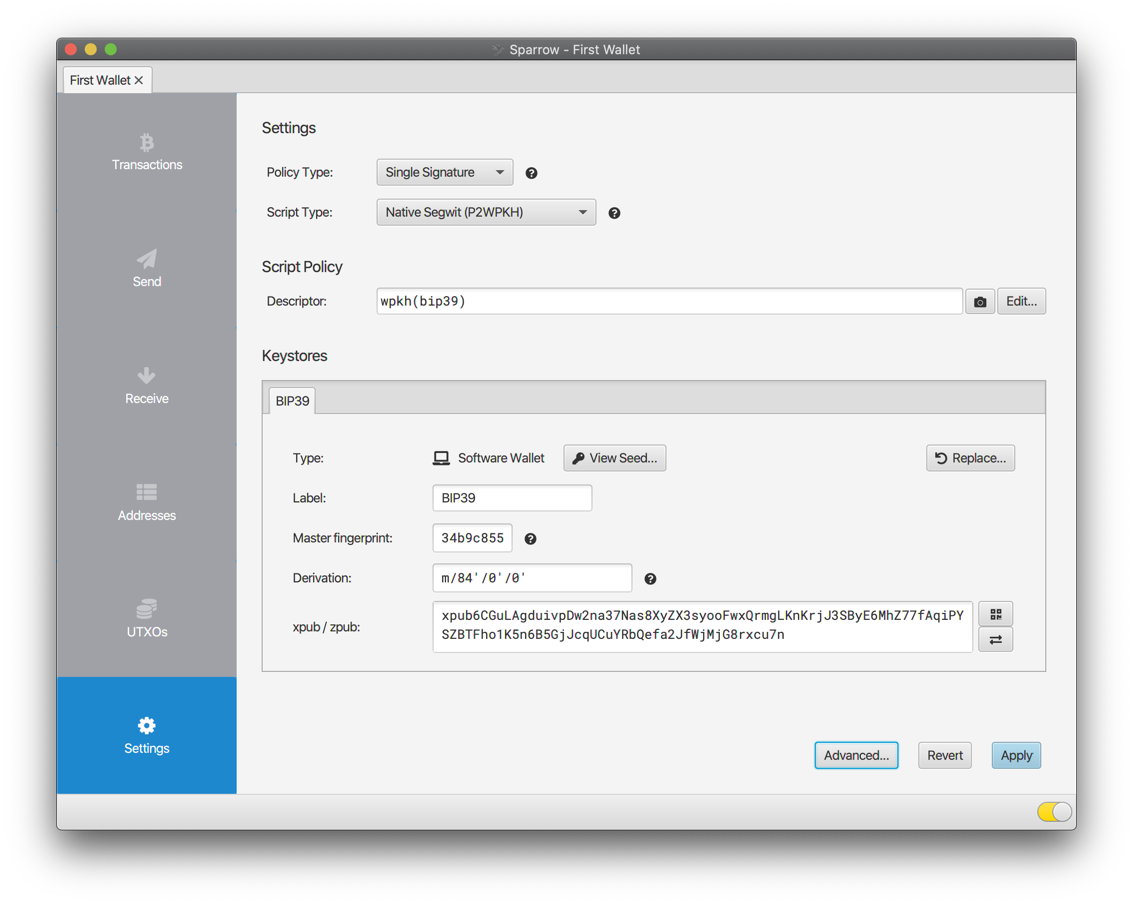
Each keystore has the following fields:
| Field | Available Values |
|---|---|
| Label | The name of the keystore (to identify when signing) |
| Master fingerprint | This identifies the master private key of the keystore, and is the same no matter what the derivation path is |
| Derivation | The derivation path for the xpub, which is usually different for each script type |
| xpub | The public key at the given derivation. Note that some script types have aliases for the xpub which identify the script type as well (ypub, zpub etc). These are synonymous and Sparrow lets you switch between them using the  button on the right. button on the right. |
Because we have already specified all these details when creating our seed, we don’t need to make any changes here. The wallet is now complete!
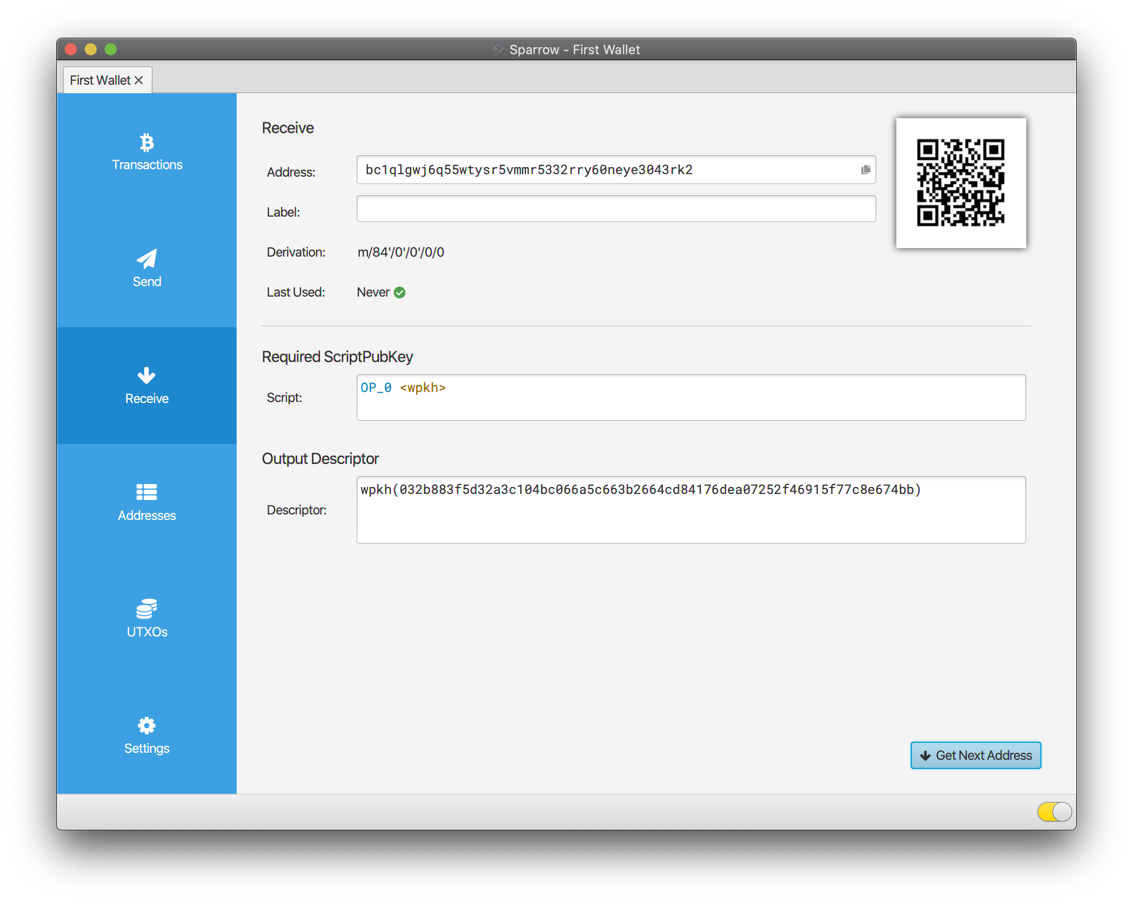
Click Apply button to save the wallet and choose a password to secure it. The grey tabs on the left will become blue, indicating we have a valid wallet. You can click on the Addresses tab to see the addresses for this wallet, or click on the Receive tab to get an address to receive funds to. On the Receive tab, click the Get Next Address to get your first address:
Once you have sent funds to this address, it will appear in the Transactions tab.
The Quick Start Guide concludes here, but has only scratched the surface of Sparrow’s capabilities. You can create multisig wallets, add hardware wallets, create and edit transactions, and manage your UTXOs - go explore!