Setup a Coldcard wallet
Prerequistes
This guide explains how to setup a Coldcard hardware wallet with Sparrow to create a secure Bitcoin storage solution. If you haven’t read the Quick Start guide yet, that’s a good place to learn how to install and get introduced to Sparrow.
Why use a hardware wallet?
If you’ve followed the Quick Start guide, you will already have Sparrow running with a software wallet. This is a good place to start getting familiar with sending and receiving Bitcoin transactions, and is a reasonable option to store small amounts. If your balance starts to grow however (to the point where you would care about losing it), then it’s time to consider purchasing a hardware wallet.
Hardware wallets offer something that software wallets cannot - they are simple devices that store your private keys and sign transactions, but otherwise have very limited connectivity and functionality. This is a good thing, because it means they are very difficult to hack! In a connected world of viruses and other malware, hardware wallets represent a major improvement in securing your Bitcoin.
Why Coldcard?
There are many hardware wallets available to purchase. The Coldcard however is similar to Sparrow in that it:
- Is Bitcoin only (no resources go to other coins)
- Transparently displays the details of your wallet and transactions
- Contains a good set of privacy and security related features
It is worth noting however that other choices are also reasonable, and in fact it is preferable when setting up a multisig wallet to use multiple vendors.
Ordering and receiving
The Coldcard should be ordered from the Coinkite store only, and not third party resellers. Ideally, have it shipped to an address that is not your home - but don’t let this be a reason for not buying one! You may need to pay for it in Bitcoin. It’s a good idea to buy a microSD card as well - we will be using one later. You should also have a microSD card reader for your computer.
Once you have received the Coldcard, examine the bag for tampering. This photo shows a new bag on the left, and an opened bag on the right:
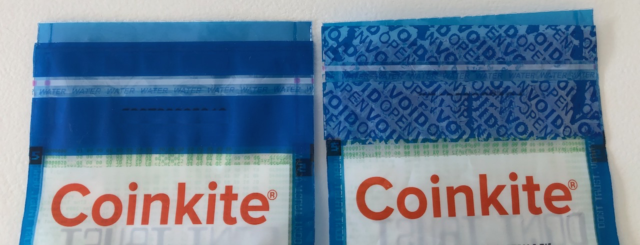
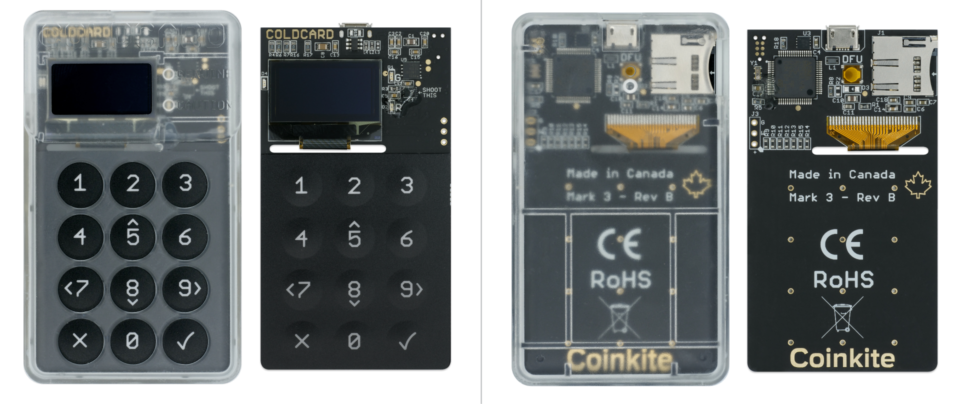
Note there is a number on the bag (obscured in the photo above). It will be used later as a further check. If you are sure your bag has not been tampered with, you can open it and inspect the Coldcard. It should look like the following:
If you’re confident the package has not been tampered with, you can proceed to setting up your Coldcard.
Setting up your Coldcard
In order to power your Coldcard, you will need to connect it to a USB cable (the MicroUSB type). The guide will take you through an airgapped setup, which means you never connect the Coldcard to your computer! This makes it even more secure.
It’s best to use a simple battery pack, since more advanced ones do not stay on for low power devices. Coinkite themselves offer the Coldpower adapter, which uses a standard 9-volt battery. If you don’t have either of these, use a USB charger connected to a wall outlet. Don’t connect it to your computer for an airgapped setup.
When you power on the Coldcard, the device will show the number on the bag. Confirm this is a match. You will then need to agree to the Terms of Sale. After that, you will need to select a PIN.
Similar to a phone passcode, this PIN is an important defense against others using the device to sign transactions and steal your Bitcoin.
On the Coldcard, the PIN consists of two parts, for example 1234-5678.
You need to choose a PIN that others cannot easily guess, and that you can remember. If you forget your PIN, you cannot regain access to your Coldcard.
Coldcard recommends using “four plus four” digits in your PIN, as in the example above.
You will enter the first four digits, and then be presented with two anti-phishing words. These words will be unique for each Coldcard, and prevent someone replacing your Coldcard with a fake copy and learning your PIN. If in future the anti-phishing words do not match the ones displayed now, don’t proceed to enter the second four digits of your PIN. After you confirm the anti-phishing words and enter the second four digits, you will be asked to confirm the PIN by entering it again.
Creating the wallet on the Coldcard
You should now be presented with the following screen:
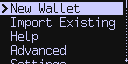
For this guide, we will be setting up a new wallet, so select New Wallet.
The Coldcard will then generate a unique, long random number, which is the seed for your wallet.
It will then encode that random number into a set of 24 words, which should now be displayed on-screen.
At this point, it’s a good idea to add additional entropy (randomness), just to be sure that your seed can only have been created once.
To do this, get a normal 6-sided dice. Then press 4 on the Coldcard.
Roll the dice and press the number 1-6 on the Coldcard that comes up on the dice roll.
Do this 100 times, and you can be sure that your seed is yours and yours alone!
Once you’re done, the Coldcard will ask you to write down the 24 words. You should do this carefully on paper only (or even better, on a metal plate). It will then quiz you to make sure you’ve done so correctly.
These 24 words are the key to your wallet - anyone who has them can steal your Bitcoin! Unless you know what you’re doing, you should NEVER enter these words anywhere but another hardware wallet. Store the words in the most secure place you can think of, and consider making a another copy for a second location in case of fire etc.
Congratulations! Your Coldcard is now ready.
Importing the Coldcard into Sparrow
Although your Coldcard is great at keeping your seed secure, it can’t create a transaction or display your balance. For that, you need Sparrow. Importing your Coldcard into Sparrow means importing the public key details into Sparrow so it can display your balance and addresses, and send and receive transactions to your wallet.
The difference between public and private keys is beyond the scope of this guide, but know that someone who has your public key can see your wallet transactions, but can’t steal your funds. The Coldcard will never export your private key.
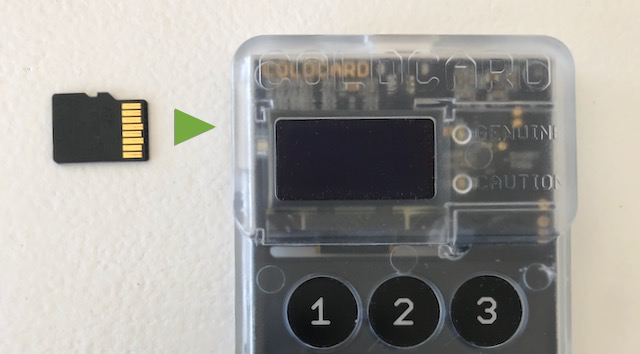
Since we are doing an airgapped setup, we’re going to use an SD card to export the public key details from the Coldcard. (Note that you can also do it in a non-airgapped fashion by connecting your Coldcard to your computer, and choosing ‘Connected Hardware Wallet’ in Sparrow later). Insert a microSD card into the slot in the top left of the Coldcard until it clicks into place.
Then, in the Coldcard menu, scroll down to the Advanced menu item near the bottom.
Select Advanced > MicroSD Card > Export Wallet > Generic JSON from the menu. Enter 0 for the account number.
This will write a file called coldcard-export.json to the SD card.
You can now eject the SD card from the Coldcard by first pressing it in gently so it pops back out.
Insert the SD card into a microSD card reader on your computer.
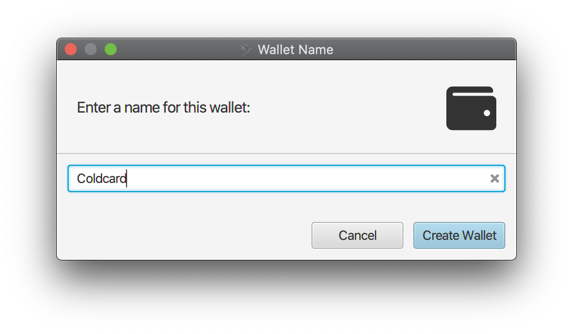
In Sparrow, from the menu select File > New Wallet and choose a name for your wallet:
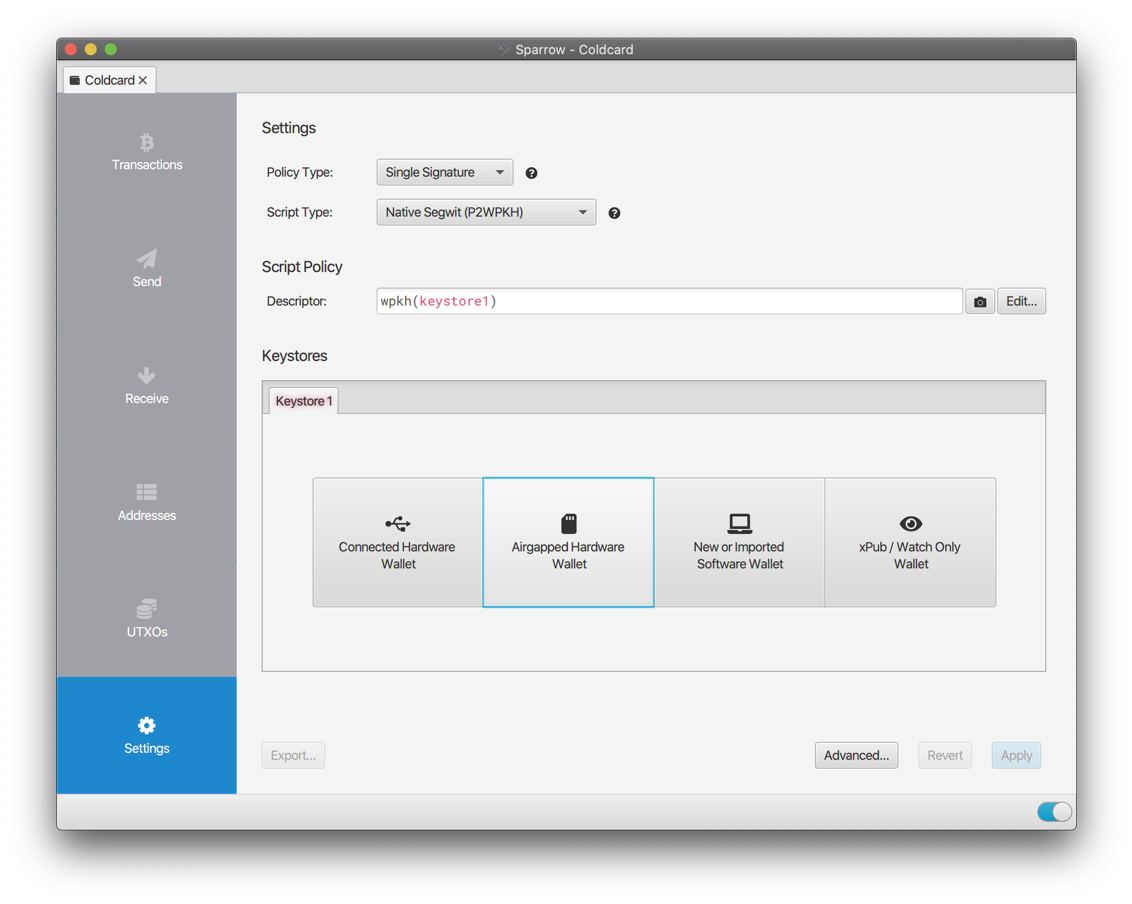
You will now see the Sparrow wallet Settings screen. You can leave all of the fields on the defaults and select ‘Airgapped Hardware Wallet’ from the four buttons below. (Note that if you are not doing an airgapped setup and have connected your Coldcard to your computer, you should select ‘Connected Hardware Wallet’ instead.)
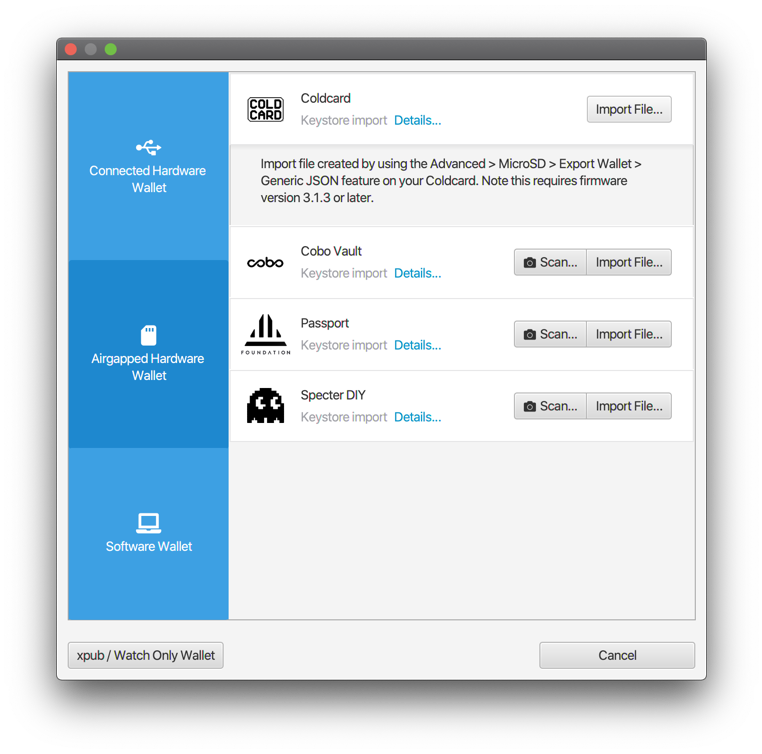
You will see a list of different import options for various hardware wallets. Look for the Coldcard option and select ‘Import File…’. (Note clicking on the ‘Details’ link will display the instructions for creating the file on the Coldcard, which we did earlier.)
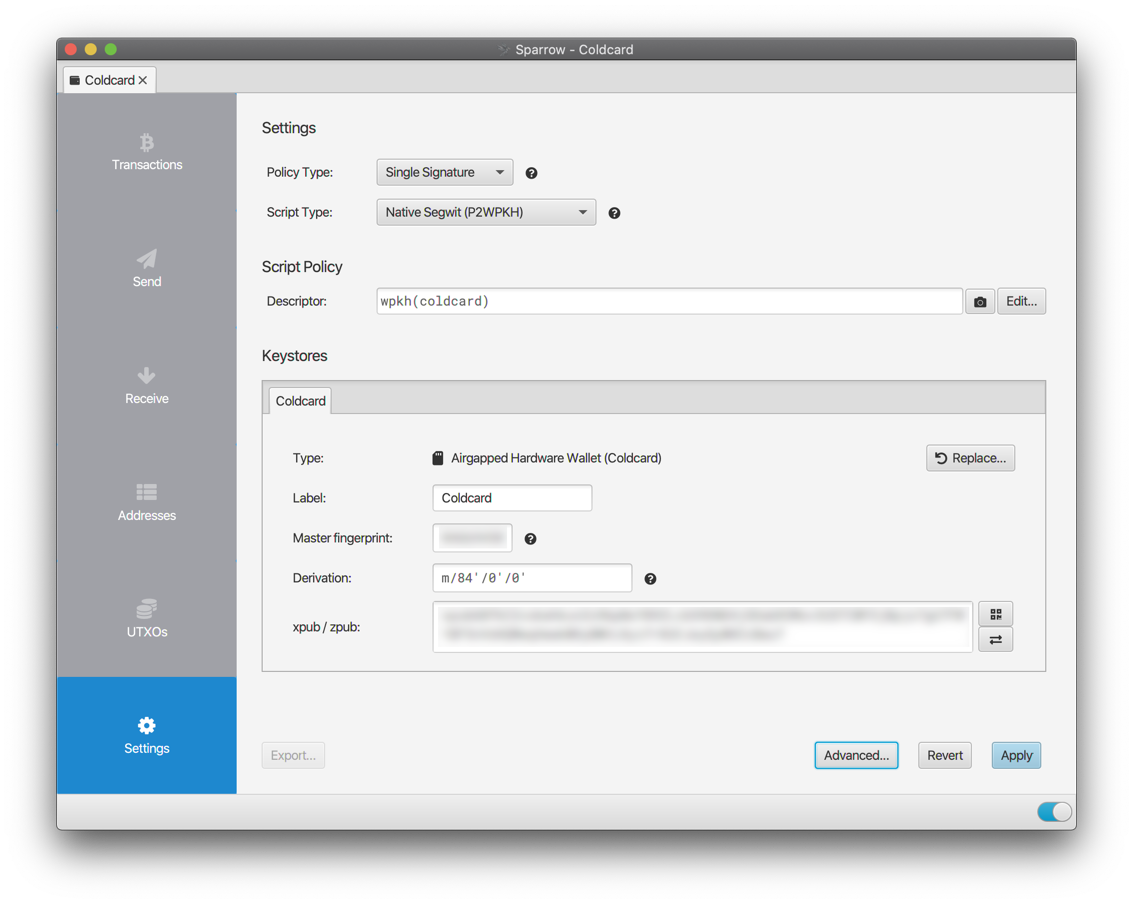
Select the coldcard-export.json file from the SD card. Sparrow will read the file and import the Coldcard’s public key details:
You can now click ‘Apply’ at the bottom. You should choose a good password to protect the wallet file - even though the Coldcard is protecting your funds from being stolen, a password on the Sparrow wallet protects your privacy. If Sparrow is connected it will look for any transactions, but since this is a new wallet there won’t be any.
Congratulations! Setup is complete and your wallet is ready to receive bitcoin.
Receiving Bitcoin
In Sparrow, using the blue menu on the left select ‘Receive’. The address field will display the first receive address in your wallet:
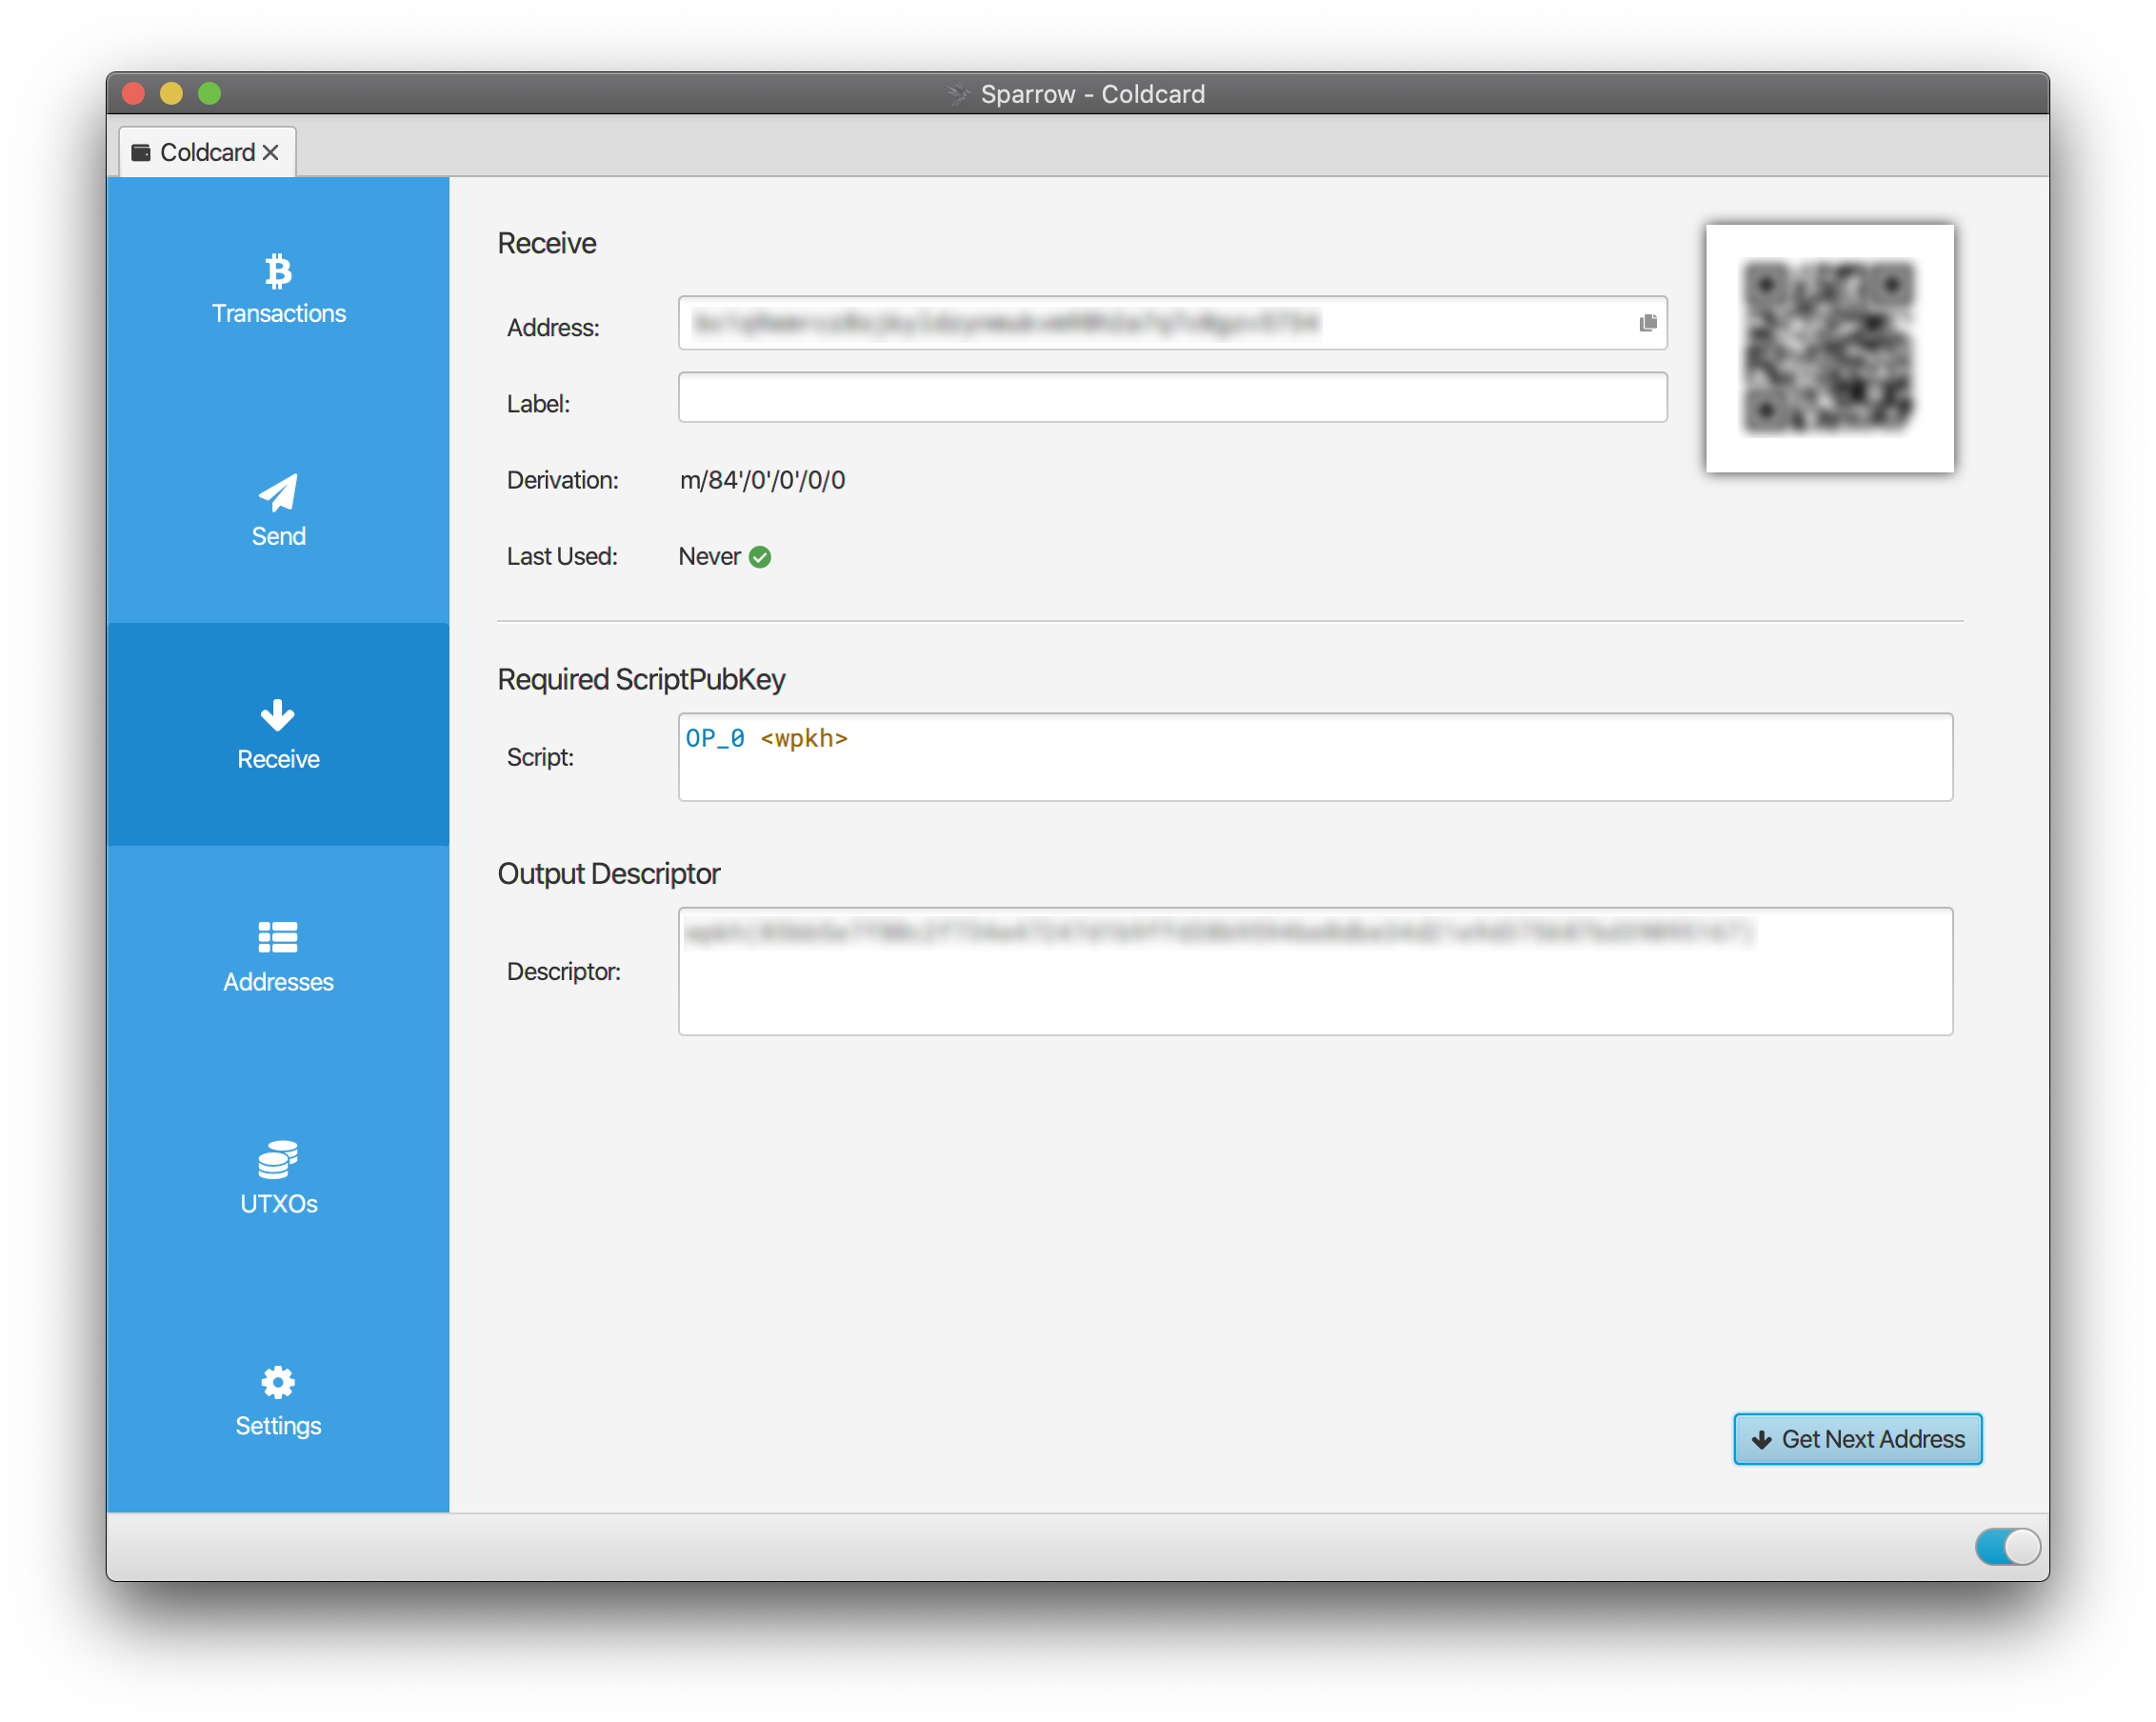
You can also confirm this address on the Coldcard using the Address Explorer feature.
From the Coldcard main menu, select Address Explorer, press 4, and then scroll down to the entry that matches the address Sparrow is displaying.
Select it to check the full address.
You can now receive to this address, for example from an exchange. Once the exchange has sent the funds, you will see a new transaction in the Transactions screen (top button on blue menu) in Sparrow. Generally you should wait for at least one confirmation of this transaction (about 10-30 minutes) before you can send bitcoin from this wallet. However, if you are sending to yourself, you can send a transaction immediately.
Sending Bitcoin
Once your wallet has funds, you can send from it. To do this, go to the Send screen and enter the destination address, the label and the amount:
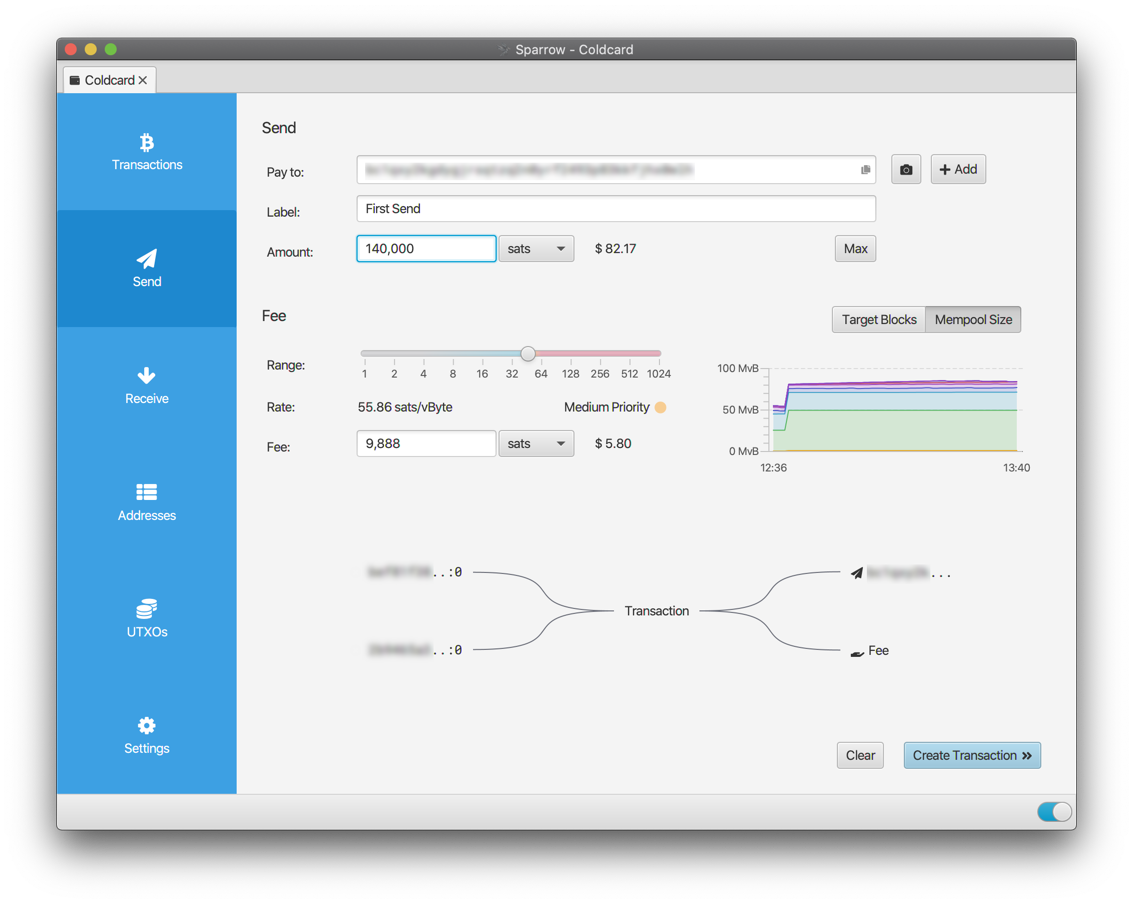
Note that you can use an address from this wallet (send to yourself) using the drop-down arrow on the right in the address field. You can then click ‘Create Transaction’. This will open up the transaction editor with your new transaction, where you can inspect the inputs and outputs. For now though, we are going to practice signing with the Coldcard.
Click the large blue ‘Finalize Transaction for Signing’ button. You will now see the Signatures area:
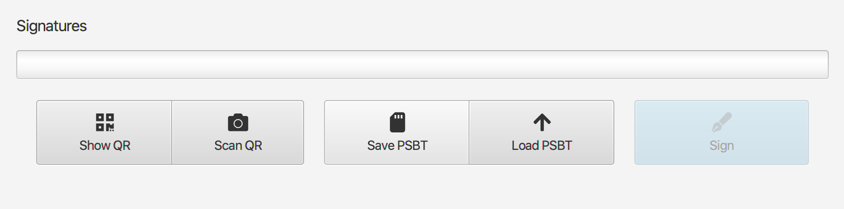
Because we are using the Coldcard in an airgapped manner, we will be doing the signing via file on the SD card.
Make sure the SD card is readable by the computer and click the ‘Save PSBT’ button.
You will save a .psbt file to the SD card, which is a type of file that contains a Partially Signed Bitcoin Transaction.
Eject the SD card from the computer and insert it into the Coldcard.
On the Coldcard, select Ready to Sign:
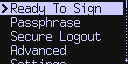
You will then need to select the file you just saved. The Coldcard will read the file and present the details of the transaction to you. It’s important to verify these details are correct. Check that the address and amount matches. You can select from the Outputs tree on the left in the Sparrow transaction editor to view these details.
Once you’re satisfied, ask the Coldcard to sign the transaction.
It will save the signed PSBT file to the SD card in a file name similar to First Send-signed.psbt.
Now eject the SD card from the Coldcard and reinsert to the computer. Click ‘Load PSBT’ and load the signed PSBT file. The signatures progress bar will fill to indicate the transaction is now signed!
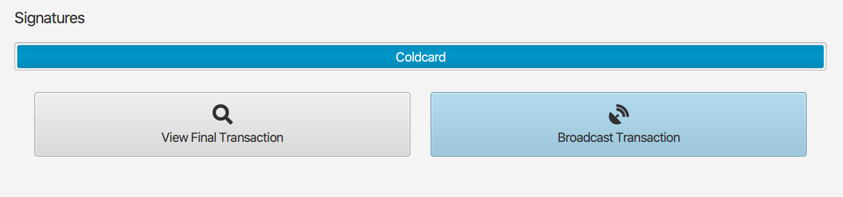
To send the transaction, click ‘Broadcast Transaction’. Your transaction will be broadcast to the Bitcoin network, and hopefully be confirmed into the blockchain shortly.
Congratulations! You now have a secure Bitcoin storage solution, and can send and receive from it. Consider upgrading your Coldcard to the latest firmware in order to take advantage of all its features. Keep it in a safe place, and it will make sure you don’t need to worry about loss of funds!
Bonus: Adding an account
You can now add an account to your wallet, which is in effect creating a second Bitcoin wallet based on the same seed but a different derivation path. A second account allows you to segregate funds (for example KYC and non-KYC funds) which ensures that differently sourced UTXOs are not linked when spending. You can also use accounts to segregate funds intended for different purposes.
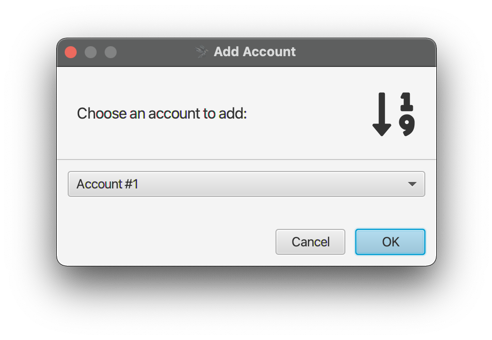
To add an Account, go to the Settings tab in Sparrow and click Add Account… at the bottom. You will be able to select up to 8 different accounts - for now, select Account #1.
Sparrow will then add a row of tabs on the left. The wallet account you have recently configured will be labelled Deposit, and the new wallet account is Account #1.
You need to upload a new configuration file from the Coldcard for the new wallet account.
To do so, select Advanced > MicroSD Card > Export Wallet > Generic JSON from the Coldcard menu, and this time enter 1 for the account number.
Click ‘Airgapped Hardware Wallet’ from the four buttons in Sparrow and upload the file just saved to the SD card.
You can then click Apply, and your second account is ready for use!